Models of the planets of the solar system for children. DIY paper model of the solar system for children. DIY fabric solar system model
Visual model of the solar system in css and html
Visual model of the solar system
The animation only works in browsers that support the -webkit standard ( Google Chrome, Opera or Safari).
Sun
The Sun is a star that is a hot ball of hot gases at the center of our Solar System. Its influence extends far beyond the orbits of Neptune and Pluto. Without the Sun and its intense energy and heat, there would be no life on Earth. There are billions of stars like our Sun scattered throughout the Milky Way galaxy.
Mercury
Sun-scorched Mercury is only slightly larger than Earth's satellite the Moon. Like the Moon, Mercury is practically devoid of an atmosphere and cannot smooth out the traces of impact from falling meteorites, so it, like the Moon, is covered with craters. The day side of Mercury gets very hot from the Sun, while on the night side the temperature drops hundreds of degrees below zero. There is ice in the craters of Mercury, which are located at the poles. Mercury completes one revolution around the Sun every 88 days.
Venus
Venus is a world of monstrous heat (even more than on Mercury) and volcanic activity. Similar in structure and size to Earth, Venus is covered by a thick and toxic atmosphere that creates a strong greenhouse effect. This scorched world is hot enough to melt lead. Radar images through the powerful atmosphere revealed volcanoes and deformed mountains. Venus rotates in the opposite direction from the rotation of most planets.
Earth
Earth is an ocean planet. Our home, with its abundance of water and life, makes it unique in our solar system. Other planets, including several moons, also have ice deposits, atmospheres, seasons and even weather, but only on Earth did all these components come together in a way that made life possible.
Mars
Although details of the surface of Mars are difficult to see from Earth, observations through a telescope indicate that Mars has seasons and white spots at the poles. For decades, people believed that the bright and dark areas on Mars were patches of vegetation, that Mars might be a suitable place for life, and that water existed in the polar ice caps. When the Mariner 4 spacecraft arrived at Mars in 1965, many scientists were shocked to see photographs of the murky, cratered planet. Mars turned out to be a dead planet. More recent missions, however, have revealed that Mars holds many mysteries that remain to be solved.
Jupiter
Jupiter is the most massive planet in our solar system, with four large moons and many small moons. Jupiter forms a kind of miniature solar system. To become a full-fledged star, Jupiter needed to become 80 times more massive.
Saturn
Saturn is the farthest of the five planets known before the invention of the telescope. Like Jupiter, Saturn is composed primarily of hydrogen and helium. Its volume is 755 times greater than that of the Earth. Winds in its atmosphere reach speeds of 500 meters per second. These fast winds, combined with heat rising from the planet's interior, cause the yellow and golden streaks we see in the atmosphere.
Uranus
The first planet found using a telescope, Uranus was discovered in 1781 by astronomer William Herschel. The seventh planet is so far from the Sun that one revolution around the Sun takes 84 years.
Neptune
Distant Neptune rotates almost 4.5 billion kilometers from the Sun. It takes him 165 years to complete one revolution around the Sun. It is invisible to the naked eye due to its vast distance from Earth. Interestingly, its unusual elliptical orbit intersects with the orbit of the dwarf planet Pluto, which is why Pluto is inside the orbit of Neptune for about 20 years out of 248 during which it makes one revolution around the Sun.
Pluto
Tiny, cold and incredibly distant, Pluto was discovered in 1930 and was long considered the ninth planet. But after discoveries of Pluto-like worlds that were even further away, Pluto was reclassified as a dwarf planet in 2006.
The heliocentric model of the solar system is a model in which the Sun is at its center, and the Earth and the rest of the planets rotate around as a result of its gravitational field.
The solar system is a system that includes the Sun, 8 planets and their satellites, asteroids, comets, meteors and space. About 99.9% of the total mass comes from the Sun, and only 0.1% comes from other celestial bodies. Planets with asteroids move around the Sun in elliptical orbits. The science that studies these celestial bodies is astronomy. This model clearly shows the planetary orbits and the order in which they are placed. Today there are many varieties of models.
"Solar system" with your own hands! July 29th, 2015
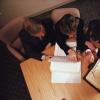
Every time the holidays come, after I'm glad that I no longer have to get up early and get the kids ready for school, and then rush there, trying not to be late for the start of classes, I think about what to do to keep them busy so that it doesn't happen. excruciatingly boring. Of course, the easiest and cheapest way is to stick a tablet in their hands, and there they will find cartoons, games, and other entertainment. But you don’t want it that way, you want the entertainment to be educational and developmental. And here you can’t do without invention and direct parental participation.
In April of this year, when we were on vacation in Moscow, the company Space Giraffe offered to test a children's creative kit "Solar system". I happily grabbed this opportunity, since Anya, following her dad Dima, has long shown a genuine interest in the topic of space and everything connected with it. Her passion is so strong that she has already managed to infect Leva with it, who quickly learned the names of all the planets with her help.
On the specified day, the set was delivered to us in an impressively sized box. The kids happily clapped their hands and jumped around while I unpacked it. And they were very surprised that there was nothing special inside. A set of paints, base cardboard and blank hemispheres, which were destined to become models of planets. Everything else is the work of the creator, into whose possession such a box falls, and the final result depends only on him.

First, it was necessary to prepare a cardboard base (60 x 40 cm), painting its entire surface black. Anya readily took on this task and, in the process of completing it, drew a little, and then joyfully painted over her pictures. She didn’t have enough strength to finish what she started (they ran out after the first 10-15 minutes) and I finished painting the base (of course, mom always gets the most boring part). However, I even liked it))) It’s quite nice to paint cardboard with black paint; this activity had a relaxing effect on me (what does a mother with many children need at the end of a working day?).

Everyone wanted to color the planets, even little Misha. We carefully switched Misha to other activities, and began to divide the planets between Anya and Leo. The greatest excitement was caused by the Sun and the Earth, the least by Mercury and Mars (because they are very small). There was almost a fight, so they painted the Sun alternately))))

While the planet models were drying, Anya began drawing orbits for the planets onto the black background base using white chalk, and I read to them about the planets we were preparing to place on the base to create a model of the solar system once they were ready.

For example, that time flows differently on different planets. One day on Mercury is 58 Earth days! And the mass of the Sun makes up 99% of the mass of the entire solar system. And also the fact that on the Moon a person weighs 6 times less than on Earth, due to the lower force of gravity, and that Saturn is not the only planet with rings of stones, ice and other particles. Similar rings exist around Jupiter, Uranus and Neptune, but only Saturn can be seen from Earth.
Taking into account the last fact, we decided not to make “rings” to any of the planets (for some reason we unanimously decided that our model of the Solar system in this form would look much more harmonious).
This is what we ended up with:

The model of the solar system looks quite impressive. Bright, educational, visual! And, most importantly, created with your own hands)
When D. returned home, Anya and Lev proudly showed him the fruit of their labor. I didn’t have time to capture Dima’s dad’s smile, but believe me, he was happy!)))

Marina Stolyarova
“Humanity will not remain on earth forever, but,
in pursuit of light and space,
at first it will timidly penetrate beyond the atmosphere,
and then he will conquer everything for himself circumsolar space"
K. Tsiolkovsky
Since ancient times, people's eyes have been directed to the sky. From the first steps on earth, man felt his dependence on the sky; his life and activities largely depended on it. Our ancestors knew and understood well "habits" sky. For them, the sky was alive, full, and manifesting itself in many ways. This love and knowledge of the sky must be cultivated in older preschoolers.
Target: create solar system layout and using his example to show that The solar system is a system of planets, in the center of which there is a bright star, a source of energy, heat and light - Sun. Nine major planets revolve around it in orbit.
Material: stationery glue, scissors, sewing threads of different colors, balloons, foil, hoop, waste material (paper, plastic boxes).
1. Prepare the necessary material. Inflate balloons of different sizes according to the required size solar system(planets, Sun) .
2. Thread a needle and pass it through the glue.

3. Wrap each ball with thread and let the glue dry.


4. After the glue has dried, remove the balloon from the threads by first untying it or bursting it.
5. For the planet Saturn, cut out a ring from foil or paper and glue it to the future planet.

6. Wrap threads around the hoop.

7. Cut out stars and comets from foil.


8. Make a ship from waste material.

9. Hang all planets, stars and comets in accordance with the location of the planets solar system. Sign the names.

10. The model of the solar system is ready.
Publications on the topic:
"Planets of the solar system" for group design for the thematic week "Space". Master Class. Like in many other gardens, we have had it.
Hello dear colleagues! I want to show you my model of "Planets of the Solar System". After all, soon April 12 is Cosmonautics Day, and the topic is...
On the eve of Cosmonautics Day, I prepared an informative visual aid to supplement educational environment materials in kindergarten.
I would like to present to your attention a model of the “Planets of the Solar System” with my own hands. Space is very big. Besides our Earth, there are others.
Any of us can name all the planets in order. One - Mercury, two - Venus, three - Earth, four - Mars. Five - Jupiter, six - Saturn, seven.
I would like to present to you a model of the “Planets of the Solar System” with my own hands. So, for outer space we will need: Frame 30*50.
On the eve of the anniversary of Cosmonautics Day, I offer you a master class on making a model of the “Planets of the Solar System”. Do it together.
Relevance of the research topic
We are inhabitants of planet Earth. Planet Earth is heated and illuminated by the Sun. In addition to planet Earth, there are other planets that are part of the solar system. They all represent a single living organism, which has its own laws and many mysteries. In the lesson of the surrounding world, when studying the topic “Planets”, in order to better remember the names, the planetary teacher offered us the game “Parade of the Planets”. Each participant was asked to take a model of their planet and take their place. This helped me remember the names of the planets better. But some guys continued to get confused about the names and locations of the planets. And then I thought that if the teacher had a model of the solar system on the table, the children would better understand the names of the planets and their location in outer space as they move away from the Sun. I had an idea to try to make a model of the solar system, especially since we already had models of the planets themselves, so that other guys could easily remember educational material. Thus, the research problem was defined.
Research problem
Difficulties that arise when mastering and consolidating educational material.
Hypothesis.
Demonstration material significantly increases the assimilation of material on the topic studied.
Subject and object of research:
Subject of research: planets of the solar system
Object of study - materials and documents about the Solar system, existing models of the Solar
Target:
To prove the effectiveness of the influence of demonstration material - a model of the solar system - on students’ assimilation of educational material.
Tasks:
Study information about the solar system on the global network.
Make a model of the solar system.
Research methods:
Questioning.
Analysis of the information received. Drawing up research diagrams.
Chapter 1.
1.1. The structure of the solar system.
Since the beginning of time, people have been interested in the origin of the Earth, Sun, stars and planets. For centuries, people have deified the Sun, Moon, and planets. However, they began to study the sky only about 5,000 years ago. Previously, it was thought that the Earth was the stationary center of the Universe around which the planets moved.The general structure of the solar system was revealed in the mid-16th century. N. Copernicus, who substantiated the idea of the movement of planets around the Sun. This model of the solar system is called heliocentric. In the 17th century. I. Kepler discovered the laws of planetary motion, and I. Newton formulated the law of universal gravitation. The study of the physical characteristics of cosmic bodies that make up the Solar System became possible only after the invention of G. Galileo in 1609 telescope . So, observing sunspots, Galileo first discoveredrotation of the Sun around its axis.
In the twentieth century, when man flew into space, a breakthrough was made in studying solar system. The modern idea of it is as follows.The solar system includes a central star - the Sun, eight planets revolving around it and their satellites, many small planets, comets, meteorites, and the interplanetary medium. All planets move around the Sun counterclockwise and all except Venus and Uranus in the same direction around their own axis.
The planets rotate in nearly circular orbits within a nearly flat disk. The four smaller ones and those closer to the Sun are called the inner planets or Terrestrial planets. These planets (Mercury, Venus, Earth, Mars) are made of metals and rocks. That's why they are also called rocky.

The outer, most massive planets (Jupiter, Saturn, Uranus, Neptune) consist mainly of helium and hydrogen. They are called gas giants.

The Terrestrial planets are separated from the Jupiter group planets by an asteroid belt. It is located just behind Mars, orbits the Sun in the same direction, and contains thousands of minor planets. The asteroids of this belt are shapeless blocks ranging in size from several tens of kilometers to 1000 km. They are similar in composition to the terrestrial planets. The largest of these small planets is Ceres (size -1000 km.). Behind the gas giants there is a second ring of asteroids separating the Solar System from other star systems ( Kuiper belt) . It contains objects consisting of frozen water, ammonia, and methane. The most interesting and largest - Pluto , , , , And Eris. This is how, in general terms, we can describe the structure of the solar system.
Planets of the Solar System.
With the exception of Earth, all the planets in the solar system are named after ancient gods. The five naked-eye planets (Mercury, Venus, Mars, and Jupiter) have been observed by humans throughout human history and have been called by different names in different cultures. Today's names of these 5 planets come to us from Roman culture. The Romans named these planets based on their movements and appearance.
Mercury
Mercury, The planet closest to the Sun began to be observed back in the 14th century BC. Different cultures, at different periods of time, gave different names to this planet. The planet was originally known as Ninuri, but later became known as Nabu. In Ancient Greece, at different times the planet bore the names Stilbon, Hermaon and Apollo. The name by which we know the planet today comes from the Romans, and is due to the fact that Mercury moves faster than other planets across the sky. Mercury is the fleet-footed Roman god of trade.

Venus
Venus, being the brightest planet in the sky, it got its name in honor of the Roman goddess of love and beauty. For your information, this is the only planet in the solar system that was named after a female deity. Since it is the third brightest object in the earth’s sky, it has been known since ancient times.

Mars

ars, the fourth planet from the Sun, named after the ancient Roman god of war. The reason for choosing such a name is obvious - the red color of the planet. However, not everyone knows that Mars was originally the god of fertility, and only later began to be personified with the Greek god of war, Ares. Due to its proximity to Earth, Mars is mentioned more often than other planets in ancient scrolls.
Saturn

aturn, the second largest planet in the solar system, received its name in honor of the god of agriculture, very revered among the Romans. According to legend, this god taught people to build houses, grow plants and cultivate the land. Why this particular name was assigned to the celestial body is unclear, but due to the active wars of the Romans, the name spread throughout Europe and Asia and became generally accepted.
Jupiter
Jupiter , like other planets, had many names in different cultures: “Mulu-babbar” in Mesopotamian culture, “Sui-Sin” in Chinese, “Star of Zeus” in Greek. The largest planet in the solar system received its final name in honor of the supreme god Jupiter, the god of sky and light.

All these Roman names were adopted in European languages and culture, and subsequently became standards in science. The remaining three planets: Uranus, Neptune and the now dwarf planet Pluto, due to their distance from Earth, were discovered much later, so it was not the Romans who gave them their names.
Uranus and Neptune
When Uranus And were discovered, several names were considered and used for each planet until one became the standard. William Herschel, who discovered Uranus, wanted to name it after King George III. Other astronomers called it "Herschel" in honor of its discoverer. Astronomer Johann Bode suggested that it would be more appropriate to use the mythological name Uranus, which would fit harmoniously with the five planets named in antiquity. However, despite the proposal, the name Uranus was not widely used until 1850.


The existence of the planet Neptune was predicted by two astronomers (John Couch Adams and Urbain Jean Joseph Le Verrier). When the planet was discovered using telescopes, a dispute arose over who should name the planet. Le Verrier wanted to name the planet after himself. However, the name Neptune was proposed and became the standard used by scientists.
Earth
Earth is the only planet not named after the ancient Roman gods. In science, several names have been assigned to our planet. Title "Earth" (E arth ), derived from “ground, soil,” was first discovered in English texts in the early 15th century. In Latin, Earth is pronounced Terra (soil). The name Tellus is also used. The Russian name comes from the Proto-Slavic root ZEM - which means “bottom”. Most likely, people named their planet, their habitat, by analogy with the soil under their feet.

Who is now responsible for the names of new planets? Since the organization of the International Astronomical Union (IAU) in 1919, it has been responsible for the names of all celestial objects. When an astronomer discovers a new object, he can submit an application to the IAU, and the IAU in turn will confirm it or offer its name.
Chapter 2. Making a model of the solar system.
Analysis of existing layouts and structures of the Solar System and selection of design for the model.
Every year, millions of schoolchildren study the solar system in lessons and in clubs. And, probably, the guys have already made layouts and models of the Solar System more than once. Before deciding on the design of my model, I decided to look at what had already been done in this direction. After studying the literature and some Internet resources, I found several types of models of the Solar System made by schoolchildren.
Flat fixed model.
A circle d-50-80cm is cut out of cardboard or fiberboard. On it, the circular orbits of the eight planets are plotted with a compass. Cardboard or foam circles representing planets are attached to the orbits. The model can be viewed on a table or hung from the ceiling.

3D ceiling model.
Several wire rockers are hung on a fishing line attached to the ceiling. At the edges of the rocker arms, balls - planets - are attached to the fishing line.

3D stationary model.
The sun and planets in this model are made of foam plastic. The planets are attached to the Sun using bamboo skewers of different lengths. There are variants of the model - the planets and the Sun are made of plasticine, of papapier-mâché.

Desktop 3D model.
A stand is installed on the stand - a screw with nuts. Planets (rattle balls) are attached to the stand using wires of different lengths.

All of these models are interesting and deserve attention, but they also have many shortcomings. The main one is the immobility of the model elements. But the real system is in motion all the time - each of the planets rotates around the Sun in its own orbit and at its own speed. For example, Mercury goes around the Sun in 88 Earth days, and Uranus in 84 Earth years. And the kids studying the solar system would like to touch the model and rotate the planets around the sun.
What seemed most interesting to me was the model made in an industrial environment.

I decided to take this design as a basis. However, it seemed to me that for this size of planets. The mechanism for attaching them is quite cumbersome. It will distract students' attention from the planets themselves. For my model I decided to take planets bigger size, and the rotation mechanism is lighter. Of course, I can’t cope with this task without the help of adults. Therefore, my grandfather, A.V. Bakshaev, became an assistant in making the model, and the class teacher G.V. Rykovanova became the leader and scientific consultant.
Making a model of the solar system.
2.2.1. Materials and components for making a model of the Solar System.
To make a model of the Solar System, the following materials and components are required:
Body of an old ceiling lamp.
A set of plastic balls of different sizes representing planets. Solar system.
Ball-shaped lampshade from a wall lamp.
A section of polypropylene water pipe.
A dozen thin tin tubes.
Braided copper wire, 1.5 mm thick.
Electrical cord with electric plug.
Electric lamp.
Epoxy glue.
Paint (color – yellow and silver).
![]()
2.2.2. Stages of working on the model.
 E
E 
Step 1. Take the base of the old ceiling lamp and, using a wrench, disconnect the stand with lamp sockets and lampshade mounts from the base. We install the longest stand (in the factory kit) in the center of the base and get the base of the model (stand and stand on which the model of the Sun is mounted). We paint the base silver.
 Stage 2. Using a rasp, we adjust the spherical lampshade from the wall lamp to fit the mount on the stand. Paint the ball yellow.

Stage 3. On the prepared piece of polypropylene pipe, mark eight segments of 2 cm in length. Centered We drill holes for each segment. Then, using a pipe cutter, we cut the pipe with the finished holes intobushings. Based on the dimensions of the existing planetary models, we determine the lengths of the rods for each planet and make them from tin tubes. We insert the end of the rod into the hole in the bushing and secure it with epoxy glue. We perform this operation for all eight bushings. If the bushings are put on the central post, we get a mechanism for rotating the rods.


Stage 4. From copper wire in PVC braid we make stands for installing planet models. We pass one end of the stand into pre-drilled holes in the model of the planet, and bend the other end at a right angle into the free end of the rod and secure it with epoxy glue.
Stage 5. We put the assembled rods (with bushings, racks and planet models) onto the central post one by one, in the order of the planets relative to the Sun.

We install the stand on the base, and connect an electrical cord with a switch and an electrical plug to the wires in the stand.

We screw the lamp into the socket and put on the sun shade. The model is ready.
Analysis of the influence of demonstration material (models of the solar system) on students’ assimilation of educational material.
To determine the influence of demonstration material on the assimilation of educational material, we used a survey method. The survey was carried out in 2 stages. 26 people took part in the survey; the age of the respondents was 8-9 years.
At the first stage, the survey was conducted among students after studying the educational material without using a demonstration model of the Solar System. Students were asked to answer 7 questions on the topic “Planets of the Solar System”:
4. Which planets are called “rocky” or terrestrial planets?
In the second stage, students were asked to answer the same questions, but after studying a demonstration model of the solar system.
The results of the surveys are presented in Appendix 1. To compare the results of the two surveys conducted, we compiled summary diagrams, see diagrams 1-7.
Diagram 1
Diagram 2
Diagram 3
Comparison of the results of 2 surveys
3. Which planet is excluded from the list of planets of the solar system?
Diagram 4
Comparison of the results of 2 surveys
Which planets are called “rocky” or terrestrial planets?
Diagram 5
Comparison of the results of 2 surveys
6. Which planets are called gas giants?
Diagram 6
Comparison of the results of 2 surveys
opposite from other planets?
Diagram 7
Comparison of the results of 2 surveys
7. What is the asteroid belt?
As we can see from the comparative diagrams, see diagrams 1-7, the indicators of assimilation of educational material by students using demonstration material - a model of the solar system - have significantly improved. Based on this, we can conclude that demonstrative material has a beneficial effect on both the assimilation and consolidation of the topics covered.
Conclusion.
Thus, the following conclusions can be drawn:
Demonstration material, in this case a model of the solar system, has a positive impact on the quality of students’ assimilation of educational material. This is reflected in the comparison charts.
The task of the project has been completed - a model of the Solar system has been created.
The creation of the model aroused great interest among class students in the subject being studied. My classmates prepared presentations:
Parade of planets. – Nefyodov Semyon
Rocky planets. - Kuvandikov Shamil
Asteroids. Asteroid belt. – Shelestyuk Georgy
Students in the class worked with a model of the solar system and expanded their understanding of the planets of the solar system. The project's hypothesis was confirmed - the demonstration material really improves the quality of the material being studied.
List of used literature
Analyzing existing models of the Solar System, I chose an industrial model of the Solar System, so the next step in determining the design of the model was the analysis of similar models made at home. The model presented on the website turned out to be the closest , I took it as a basis. Moreover, I would not be able to cope with such a task alone, and my grandfather is V.A. Bakshaev. - An engineer by profession. He approved of my choice and became the leader in the practical part of my project. org – interactive map starry sky
Annex 1
Results of a survey among students
1 SURVEY
Appendix 2.
What do I know about the solar system?
1. How many planets are there in the solar system?
2. Name all the planets in the solar system.
3. Which planet is excluded from the list of planets of the solar system?
4. Which planets are called “rocky” or terrestrial planets
5. Which planets are called gas giants?
6. Which planet orbits the Sun sideways?
opposite from other planets?
7. What is the asteroid belt?
Subscribe to news
In our material you will find the most interesting ideas crafts on the theme "Space" that a child can make with his own hands for projects at school or for self-study Universe.
The mysterious cosmos and everything connected with it have always fascinated both adults and children. Is there life on Mars, why do stars glow, how to get to the Moon - . If your child enjoys this topic, encourage him to explore space in more detail. This will be a wonderful start. And so that studying your favorite topic does not turn into boredom, invite your child to make interesting crafts about space with his own hands for school.
Such DIY children's crafts about space not only have an educational effect, but are also perfect for concentrating a student's attention. With their help, you will be able to act out stories from , your child will learn more about the solar system and will be able to prepare well for thematic lessons at school. Just imagine the joy of a child when his craft about space at school receives a lot of praise!
How the Solar System works: a cheat sheet for children's crafts for school on the theme of Space
Tell your child how the solar system works: what planets are included in it, how far the Earth is from the Sun. Let the child gradually remember the names of all the planets. Don't rush it - it will take time.
Crafts for children on the theme "Space" with your own hands


.jpg)
.jpg)
.jpg)
If nothing works out with foam plastic, you can draw the planets on cardboard and place them in the same way as the foam ones, as shown in the pictures above.
.jpg)
Planets are an absolute element of any craft about space. Making similar planets from threads is not difficult. Step by step instructions and what you need for the craft you will find in our master class on how to make it, because the principle is the same.

.jpg)
Saturn made from a foam ball and an old CD - a great idea for a small craft about space with your own hands. Main- find at least one old disk at home.

Interesting mobile made of felt planets, stars and spaceship This will be an entertaining craft for a child about space with their own hands, because it will require time and patience. And such a mobile will be a wonderful decoration for the room. If it’s hard for your child to handle, let him build a similar mobile out of paper.

What about a soft solar system? These pom-pom planets are very pleasant to hold in your hands and can be easily carried to school for lessons. - do not wrinkle and fit easily into a backpack. , read the link.
.jpg)
Simulating the surface of the Earth - a very beautiful and simple craft. A child can make it as a craft on a space theme, because the Earth- this is one of the planets of the solar system, or as a craft to school on Earth Day. Watch the master class on how to do it at the link.


Every space lover dreams of flying there one day. But while your child is still learning the basics of space exploration, invite him to make a rocket like this. Both a great toy and an incentive for a future profession!
.jpg)
.jpg)
When studying space, you simply cannot do without stars and constellations. Having made a similar craft with your child from toilet paper rolls, rubber bands and cut out paper diagrams of constellations, it will be more interesting to study astronomy. Poke a needle through the black dots on the diagrams, stick over the black paper onto the sleeve and secure with an elastic band. The child can look into the sleeve as if through a telescope, or use a flashlight to illuminate the holes from the inside. You can download constellation diagrams from this link.

It’s very simple to make a craft on the theme of space and planets with your own hands, which you can also wear on yourself. Girls will especially like this. You will need beads of different sizes and colors. If there are no beads of the required colors, do not let the child be upset, because they can always be recolored.
Now, when your child needs to make a space-themed craft for school with his own hands, you won’t have to spend the whole evening racking your brains about what to build and how. And here we are for some reason confident that these DIY crafts will captivate not only children, but also adults. Make interesting crafts with your child, watch educational cartoons, read and discover the secrets of our Universe together!
An unusual and very useful educational material is a model of a reduced and original solar system, which is easy to make with your own hands. Such crafts will not only allow the child to learn the names of the planets, but will also teach them to correctly navigate in sizes and distances. Let's try to make two versions of the layout for children: from newsprint and from plasticine with beads.
How to make a realistic model of the solar system with your own hands step by step
To make a reliable model for our solar system, you need to know the approximate sizes of the planets, their distance from the Sun and colors.
- Sun – yellow, diameter 1391400 km;
- Mercury – gray, diameter 4880 km, distance from the Sun 58 million km;
- Venus – pale yellow with white streaks, diameter 12140 km, distance from the Sun 108 million km;
- Earth – blue with green splashes, diameter 12756 km, distance from the Sun 150 million km;
- Mars is red-orange, diameter 6787 km, distance from the Sun 228 million km;
- Jupiter is light orange with white splashes, diameter 142800 km, distance from the Sun 778 million km;
- Saturn – light yellow, diameter 120660 km, distance from the Sun 1.4 billion km;
- Uranus is pale blue, diameter 51118 km, distance from the Sun 2.9 billion km;
- Neptune is bright blue, diameter 49528 km, distance from the Sun 4.5 billion km;
- Pluto is light brown, diameter 2300 km, distance from the Sun 5.9 billion km.
The paper model of the solar system looks very solid and can decorate the interior of both a children's room and a classroom. This is a wonderful gift for a teacher.
- old newspapers or low quality thin paper;
- toilet paper or paper towels;
- PVA glue or any other office glue;
- the basis of the layout is a round piece of plywood or thick cardboard;
- acrylic paint on wood;
- gouache for coloring planets;
- long screws;
- brushes of different thicknesses.
Take a piece of newsprint, crumple it thoroughly and crumple it into a ball. Wetting it generously with water, give the newspaper blank the most rounded shape possible. Then we wrap it in 2-3 layers of toilet paper or napkins, wet it again and form a ball. There is no need to strive to obtain the smoothest possible surface; small cracks and dents look more natural, forming the relief of the planet’s surface.
Using a brush, apply a little glue to the resulting ball and leave it to air dry. We make preparations for other planets in a similar way, trying to at least approximately maintain their proportions.
While the balls are drying, we are preparing a model of the starry sky. To do this, lightly sand a piece of plywood and paint it with 1-2 layers of dark blue acrylic paint. After drying, we randomly apply stars, comets and constellations to the surface of the model with thick white paint, as shown in the photo below.

We paint the paper balls in accordance with the above data. For Saturn we make a ring out of cardboard.
After the paint has dried, the planets can be mounted on the base. To do this, in the places where the planets are attached, we screw long self-tapping screws into the plywood disk from the bottom up (with the sharp part facing out). Then we carefully begin to screw the balls onto the screws.
The order of the planets from the Sun is: Mercury, Venus, Earth, Mars, Jupiter, Saturn, Uranus, Neptune. On the layout it will look like this:

If desired, planets can be labeled, satellites and asteroids can be added.
We analyze the second version of the space model made of beads and plasticine
Another version of the layout is an easier-to-make compact 3D model made of beads and plasticine.

- plasticine of any color;
- beads of different colors in accordance with the colors of the planets;
- bamboo skewers;
- adhesive tape;
- White paper;
- cardboard;
- tailor's pins.
- We mold balls from plasticine, observing the approximate proportions of the planets. For the Sun it is enough to make a hemisphere.
- “Coloring” the planets with beads. To do this, scatter beads of the desired color onto a piece of paper and roll a plasticine ball over it so that the beads are pressed into it. We decorate all the balls in this way.
- We cut the bamboo skewers into pieces of the required length plus 1.0 cm on each side for fastening:
- 6.3 cm for Mercury;
- 10.2 cm for Venus;
- 12.7 cm for Earth;
- 15.2 cm for Mars;
- 17.8 cm for Jupiter;
- 20.3 cm for Saturn;
- 25.0 cm for Uranus;
- 29.2 cm for Neptune;
- 25.5 cm for Pluto.
If desired, color the skewers black or brown.
We attach the Sun to a piece of cardboard, previously painted dark blue.
We string the planet balls onto skewers and attach them to the Sun.
Using paper and adhesive tape, we make small strips and sign the names of the planets; you can print them on a printer. We fix the resulting miniature signs on pins and stick them into the corresponding planets.
The model made of beads and plasticine is ready!
Video on the topic of the article
Using the video lessons below, you will learn how to make other layout options.
When studying geography with small children, it is very good to use some visual aids in the form of models and layouts. Especially when these objects being studied are something out of reach (for some, mountains, waterfalls, etc.), and generally represent something semblance of an abstract thing (for example, space), because even we, adults, sometimes cannot I can wrap my head around this entire Universe, it’s so incomprehensible, brilliant... just “Space”!)))) What can we say about children, for them, in order to assimilate such material, for a better understanding of what is happening, a model or a model can be very helpful for them, and for their parents It will be easier to explain some processes than in a picture (in a book or on a poster). In stores, such models are very expensive; on the Internet there are quite a lot of ideas for creating models of the Solar System with your own hands. But in each of them there was something that didn’t suit me: the mechanism itself, the dimensions of such a layout, or the clarity.
As a result, at one point, I myself came up with what I wanted, and this pleasure cost 0 rubles. everything we needed was found at home. With all this, I was able to show my creativity and took into account all my wishes. My main wishes were:
- visibility
- layout size (our apartment is not large, so the layout had to be small)
- the planets must revolve around the Sun and the Earth around its axis
- the name of the planets so that the baby can read it.
The only thing is that it’s quite difficult to make the planets proportionate to each other, so everything here is very arbitrary, I think you’ll understand why. Otherwise I would have to make small planets in the form of grains of sand...
This is what we got
I did it together with my dad, he helped me do some technical work.
If you want to create something similar, I will try to describe in detail how it was done and with what help.
For the base of the model body we will need a box, or just a good strong corrugated cardboard. I used a box from SMEs (I don’t store kits in boxes, it’s not very convenient for me and takes up a lot of space, so they go into use, I hope Umnitsa won’t be offended by me for this)))
The base of the layout is from the inside of the SME, into which cards are inserted as dividers. If you take everything apart, one of the parts looks like this: 
If you don’t have such a box, then using tape you can glue something like this out of cardboard.
The lid allows you to adjust the angle of inclination to suit me. This will be the bottom of the layout and its back will be the support.
Next, we need to cut to size: a) the front wall (a disk with planets will be attached to it) b) a disk along the diameter of the front wall (the planets and the sun will be located on it and it will rotate) c) side walls (to close the holes on the sides ), they will be in the form of two triangles. We measure and cut. D) front wall - a sign with the name of the layout (this will close the hole for us (the cards were inserted into it) and we can place the inscription on it)
It looks like this 
And if you put everything together, then so. It will be clearer to you what is what 
In my case, all parts of the layout were made of white matte cardboard. If you suddenly don’t have one, but only have glossy and colored ones (with pictures like on the boxes), then there may be a problem with painting. The paint will not adhere well and the pattern of the box will show through. You will need to first cover such cardboard with white paper. And then paint it. Later on, the paint adhered perfectly to this cardboard.
Next, we outline approximately how the planets will be located and what they will be like.
To do this, I used books and images of planets in them. 
I drew circles of future planets on paper and signed them. This will be useful for future planetary casts. 
Using the same principle, I drew a circle, marked the locations of the planets and orbits. 
Let's paint. I used simple gouache in 2 layers.
The front side of the layout was painted black, everything else was blue so that it would not be too gloomy. 
After drying, I used a toothbrush and yellow paint to make splashes of stars and comets. 
After drying, I covered everything separately with tape, so it’s more secure and doesn’t get dirty. I added gold sequins, these are also stars. They're on tape. 
We sculpt planets. We make salt dough. We take the planets previously drawn on pieces of paper and roll salt dough balls in proportion to them, and immediately (!) insert an aluminum wire into two of them - into the Sun and into the Earth. We fold it in half so that two tails stick out from them. 
We simply put those planets without wire on a sheet of paper, next to the name signed for them (so as not to confuse who is who later), and those with wire, we pierce the sheet of paper with the wire and put it in a glass. I was so dry for 2 days. 
So that the bottom also dries well, we turn everything over, I put it in an egg carton so that it does not deform and put it on the radiator for another 1 day 
When everything is dry. For the Sun and Earth, we drop super glue into the hole where the wire goes in so that the planets don’t jump off them in the future.
We paint the planets. I used gouache. I took MnL cards as a sample. I mixed paints to make it look similar. Let's dry it. 
We mark the center on the round disk and use a compass to draw the orbits. We outline each orbit with a marker (I have a marker for signing computer disks. The surface is already covered with tape, so everything could be smeared with a simple marker, but not with this one). 
And then my husband got involved in the work. We attach the Earth to the intended orbit. We insert a wire into the hole on the round disk and fasten it on the back side so that the planet can then spin around its axis. We connect the round disk and the square part (front) of the layout. Make a hole in the center with an awl. We insert the Sun through it. It will serve as the core of the entire rotation (this entire round disk with the planets will rotate around the Sun, and the Earth, the movement of the fingers, will also rotate around its axis). We secure everything well on the back side. 
I printed the inscriptions for the planets and the name of the layout in advance. Cut it out. Since the layout itself is very small, the inscriptions are small, but Stas reads them without problems and they do not clutter up the CC itself. 
We glue all the other planets into their orbits using super glue. Inscriptions on tape. 
After that, I made the asteroid belt in the form of beads. I glued it with super glue (just be careful, don’t overdo it with glue).
Before this, I thought that it was not necessary to make someone beautiful back layout and it was not painted. But that's not the point. It will also be visible, so I painted it too. It looks like this 
Now you can assemble the structure. We attach the invisible parts with double-sided tape; the outer parts are sealed with transparent tape for strength so that they don’t fall apart.
So, first we attach the front part 
The inscription Solar system, close the hole. 
We assemble the side, triangular parts using the same principle. 
I also forgot to say about the pen. To make it more convenient for the baby to turn the disk, I made a protruding handle. You can easily grab it with your fingers. 
And I forgot, I did it later, painted the rings of Saturn. I didn’t do them for Uranus and Neptune, because... In some places they are not drawn at all, but in others they are very thin.
That's all! By moving your hand, we rotate the disk, and, accordingly, all the planets around the Sun (the Sun itself does not rotate, it stands still, like a rod). Tell how this happens and the length of the year. About orbits. We can spin the Earth around its axis with our fingers and talk about the change of day and night. See the location of the planets, read their names, about asteroids, what they are and where they are. Yes, and I made 9 planets, somewhere they are already indicated as 8. Which planets are in size, color, composition. That is, anything))!
Clear, compact. Everyone is happy. The child appreciated it. This helped us a lot in studying the first topic in geography - astronomy.
And now, once again, the result, from all angles.
Behind 
Side 
Front 
And in proportion to Stas. The layout is very small. 
And in this video Stas names the planets on the model))
I will be glad if you like it and find it useful. And our circle “Crazy Hands” or “From Waste to Income” will continue its work. Then we'll make something else. Bye everyone!!!
Read also...
- Motivational theories. Motive and motivation. Theories of motivation Theories of motivation in various psychological directions
- Purpose of the Phillips School Anxiety Test
- Samara State Regional Academy
- M. V. Koltunova language and business communication. Language and business communication Etiquette and protocol of business communication